To go through my tips and tricks/process for making the lettering with the middle stitch, I’m going to get help from Mr. Joe Biden.
 |
| Hey Joe! |
Let’s talk about lettering. First off, the font I use is “Phosphate” in photoshop. I like using the mid-line font feature as a stitch guide.
I start by cutting out all my teensy letters. I don’t cut out the centers of any letters save for the larger ones. I.e. I don’t cut out the center of “A” or “P”, but I’ll cut out “D” or “O”. Mostly this is because I’m lazy and such detail is tedious to render, but also the payoff isn’t worth the work--it doesn’t really show up anyway.

I cut out approximate sizes of felt for each of the letters. I find it easiest to work with small pieces even though it requires slightly more dexterity when stitching. Note that I am NOT taping the letter pattern pieces to the felt. This makes the stitching a bit more difficult at first (the first few stitches you’re dealing with a wiggly piece of felt/pattern), but it makes the paper pattern pieces WAY easier to remove afterward without pulling stitches or getting frustrated.

A note about felt. The standard craft store felt sheet is 1.5mm and pretty floppy. This works for letters and you can certainly use it. It’s also the easiest to obtain. However, if you can get your hands on some 1mm felt that is slightly stiffer (like this “B” style—amazon link: https://smile.amazon.com/Polyester-Nonwoven-Squares-11-81x11-81inch-30x30cm/dp/B019RIWEEK/ref=sr_1_8?ie=UTF8&qid=1483976710&sr=8-8&keywords=felt%20sheets) then your edges are going to be crisper, it will fuzz less, and it will be generally easier to work with.
You can see the difference here. The top sheet is 1mm, the bottom is 1.5mm.

These letters, for instance, were rendered in 1.5mm. They still look great, but you’ll notice that neither edges nor stitching is as crisp.

For the stitching in the letters, you’ll want to use 2 strands out of a 6 strand piece of embroidery thread. Simply pull apart the strands from your thread piece.

You don’t *have* to stitch in the middle of your letters, but I like the effect, and I think it is easier to read. You’ll notice Ruth Bader Ginsberg has no stitching and it still looks fine, so this is certainly an option.

But I’m showing stitching. So here we are. I use the backstitch for the detail. If you’ve seen my other tutorial or you’re familiar with backstitching, this following description may be a bit redundant.

First, what you’ll want to do is push your needle up through the back of the piece at a point that is a stitch-length away from a corner.
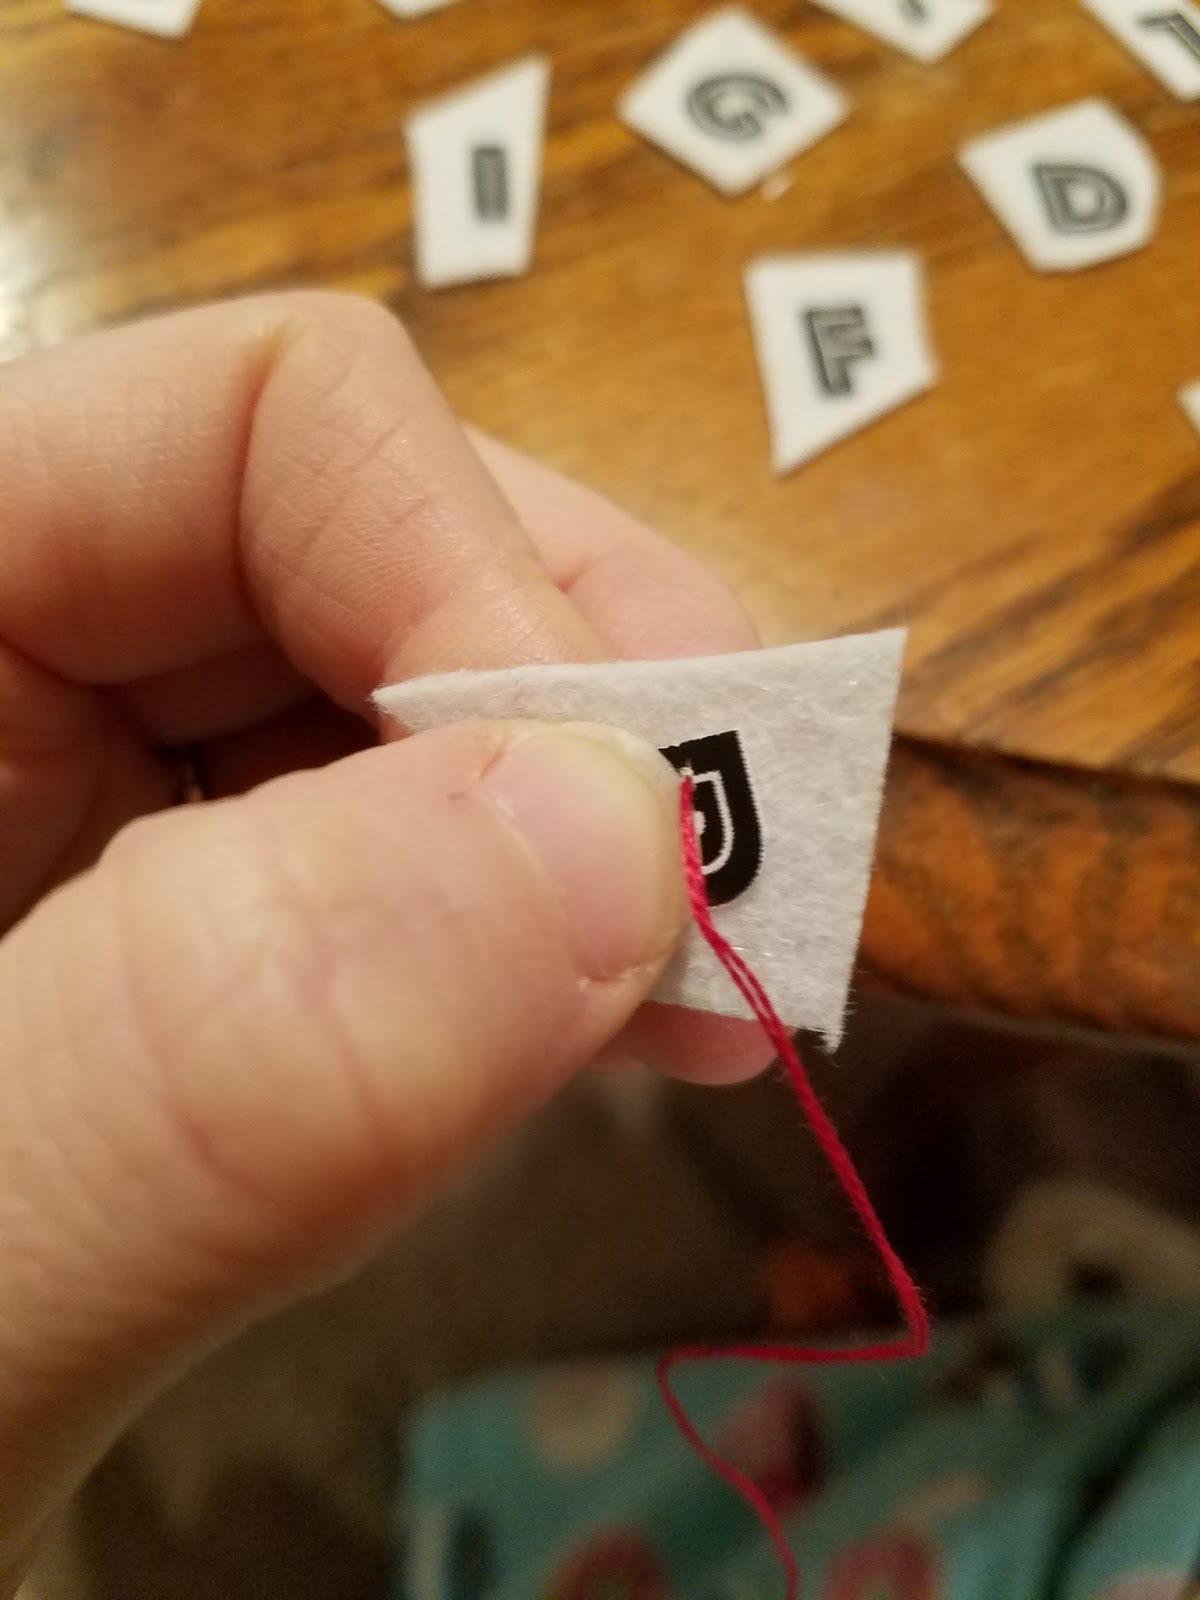
Pull the thread through.
Push the needle back down through the top of the piece “back” toward the corner.

There is your first stitch.

Repeat again—pull your needle and thread through the back of the felt a stitch-length away from your previous stitch, and then push your needle back down through the SAME hole as the beginning of your first stitch (the previous stitch).
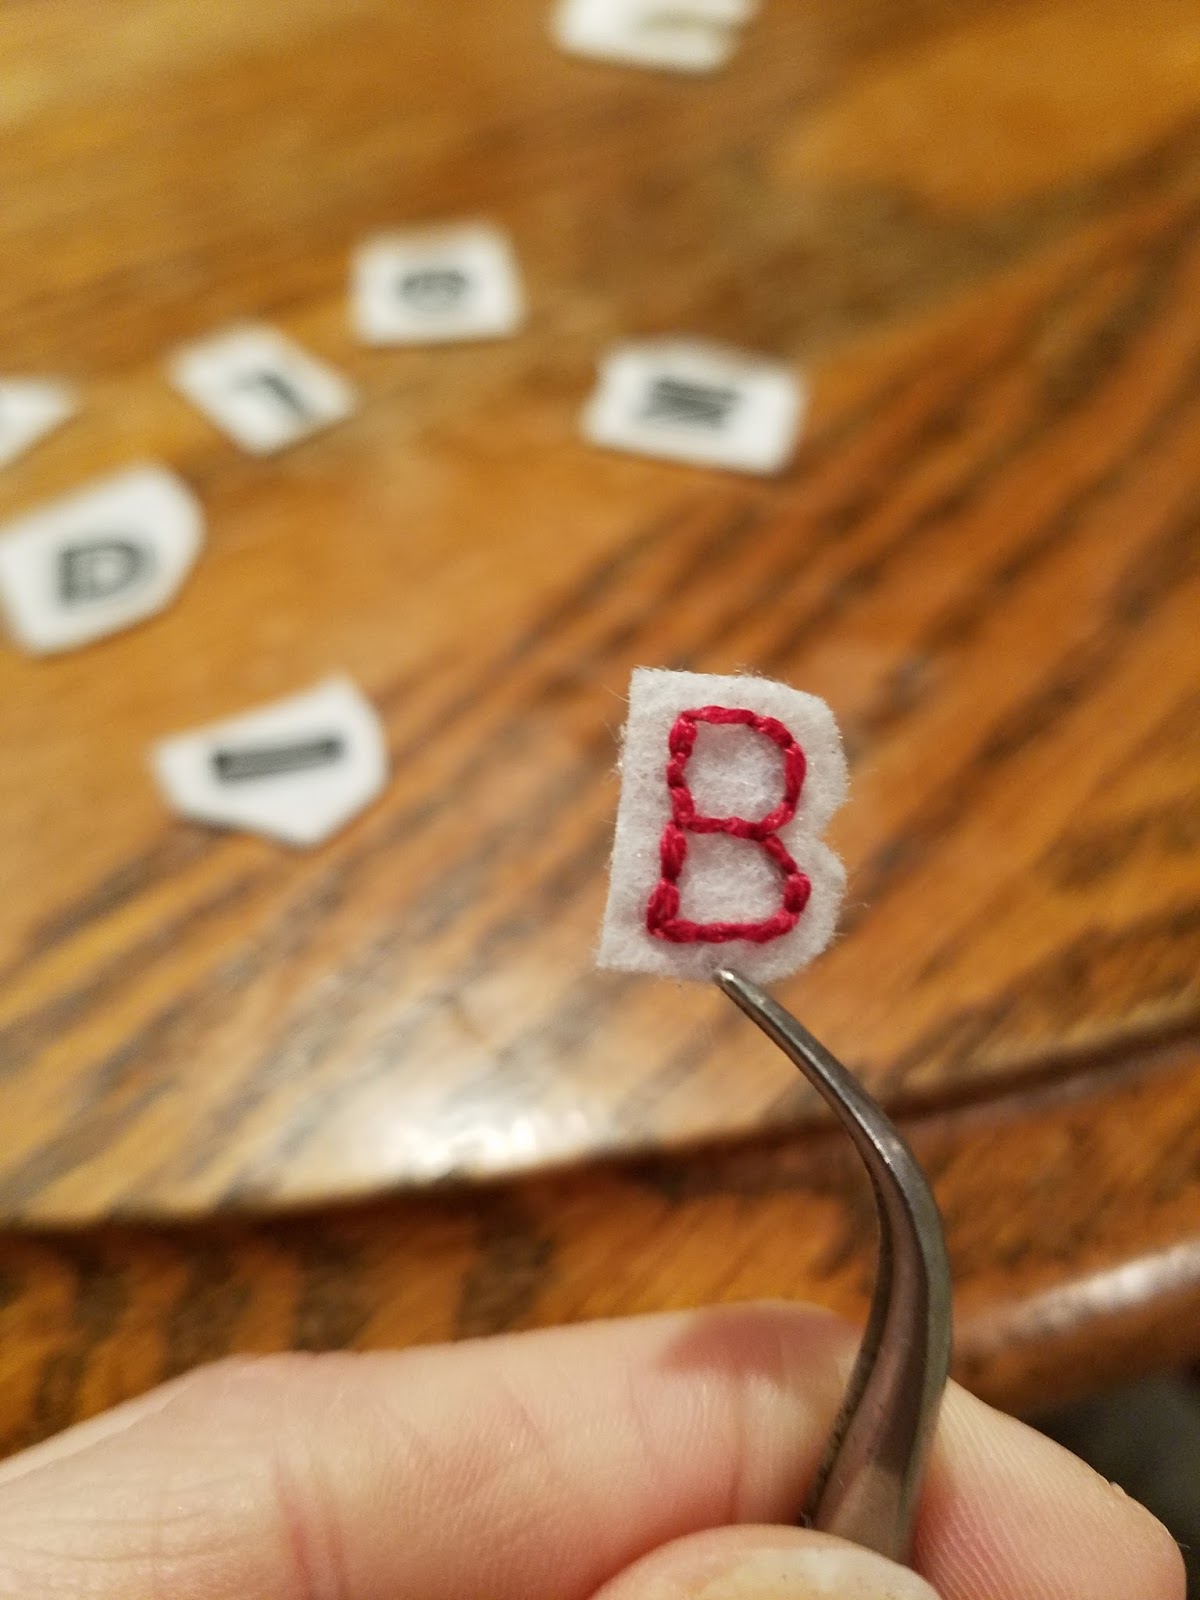
And proceed on with that all around the marked stitch detail of the letter.

When you’re done, you can snip your thread ends. Your letter will be stitched on to the felt.

The back will look like this. You can trim these thread tails very closely.

Now you can cut your letter shape from the felt. I always stitch-then-cut—it’s easier to work with that size piece, and there’s less worry about a paper pattern piece slipping a little bit.

Now—what I like to do after this is hot glue the tails of the thread down to the back of the letter. You could just knot your thread tails or you can skip the glue, but I find this is the best way to keep the tails from straying over the edge of the piece and showing. It’s also a good way to keep them secure so, while you’re removing the paper pattern, you have less chance of pulling out a stitch.

Now I remove the paper pattern, holding a finger over the stitch as I tear the paper to eliminate tugging on the thread. This is slightly tedious work, but having non-taped paper makes it easier.

This is what it looks like with the pattern removed and all glued up.
I don’t usually do the whole process for just one letter at a time (I did this to show step detail). Here are the rest of my letters stitched in on felt.

And cut out.

And glued on the back. I like to hold the letters by the paper pattern piece with a tweezers while gluing.

And here, all my letters are glued in the back. Of course, when you glue them, set them down upside-down so you don’t end up gluing them to the table. This may seem obvious, but hey. I’m just warning you.

Once they are all glued, remove the paper pattern. For some reason I didn’t get a picture of this at the completed stage.
Set your letters out on your piece BEFORE gluing them down. This will help you get a good sense of spacing. Once you have them positioned how you want them, you can lift them one by one with a tweezers and glue them into place.

Aaaand, scene. Thanks for showing us how it’s done, Joe Biden.
Of course, you can always NOT have writing on an ornament. If you want to just skip doing the letters altogether, that’s on you.
No comments:
Post a Comment