
I got a few requests to make a process post showing how I make my ornaments/felt crafts. So I took pictures while making a new ornament: Betty White!
I'm going to walk through some of my techniques and tips and tricks and you'll also see some of my thought process/adjustments as I go along (this is my first time testing the pattern).
(Forgive the basement lighting--the color will be inconsistent, but you'll be able to see what I'm doing, generally.)
And because there are so many pictures...it's behind a cut!
I pre-cut a lot of my pattern pieces in my spare time (i.e. while my toddler watches Finding Nemo), so I don't have a picture of the whole pattern. The first thing I do, though, is cut the pattern pieces. I like having the reference sheet beside me the entire time so I remember how the layering is supposed to look, can figure out if I've misplaced a piece, etc.
If I'm pre-cutting, I don't precise-cut the smaller pieces right away. This is so I don't lose them and, also, so I remember what color they're supposed to be.
You'll also notice that I've already changed the color of a pattern piece. Sometimes I just need to see everything laid out to know that something is going to work or not. So the big circle becomes pink instead of yellow.
Note--the lines on the inside of the pieces are for stitch reference. Don't cut these unless specifically noted (i.e. the eye holes).

Now I cut out approximate-sized pieces of felt for each piece. I find this the neatest way to work, and I also think it's easier than taping the pieces to a large sheet of felt and then cutting.


I.e. You'll notice how I taped along the edges of Betty's face, but took care not to tape on her facial features where I'm going to stitch.

Now it's time to cut/stitch. I like to start with big pattern pieces and work my way down to the smaller pieces. It makes it easier to keep track of them.
With the big circles I cut one out and then re-tape the pattern to cut the second one out.
Note: Sometimes I glue-as-I-go with patterns (the patterns specify to glue the ribbon at this point), but for the sake of this post I'm going to be doing all my cutting/stitching, then move on to gluing. You can do it either way--for me it depends on whether my glue gun is already hot from another project or if I'm super-concerned about losing a small piece or being interrupted.

Now let's talk about stitch order. Stitch before cutting. As I move on to the next piece, the inner circle, note that I'm going to stitch before I cut out the piece. This makes it *so* much easier to hold the piece in place while stitching.
I use a regular piece of embroidery thread (6 strands, together). Note that in my patterns, unless I specify fewer strands, you just use the full piece of thread. Also...I didn't label the stitch color! Oops! It's light pink, like the outside.
I'm using a basic running stitch for the detail. You bring the needle up through the back...

And you bring it down on the other side of the mark. The running stitch is super easy to pull out while stitching, so use a finger to hold the tail down. (If you want, you can tape it, but I like to minimize tape contact on felt I'm going to use--it can pull and get fuzzy. )

Continue around the perimeter of the circle, and tie the ends together when you're done. I will sometimes glue ends down if they're close to the edge or unruly, but these were fine just tying.


Then you're ready to cut.

And the next step will be to remove the paper pattern. Carefully, so you don't pull up the thread. With a stitch like a backstitch, you use small stitches and the paper is usually easy to remove. That's not really an option with the running stitch, so I like to place a finger on the stitch while removing the paper to prevent tugging. (Not like this...but I had to have a free hand to take the picture.)

Now the stitch detail on the shirt! We're going to use two different stitches here. The first is the french knot. There are lots of good videos that illustrate how this is done--they're better than still pictures--but I'll try to give you a rough idea.
I had marked to use yellow thread. I decided white would be better. On the fly. Because that's how I work.
For the button detail, you bring your needle up through the bottom of the button mark. You wrap your thread around your needle twice.

Then you bring your needle down through the center of the button mark (this should be very close to the original stitch). Keep the thread tension tight as you're doing this. You'll notice my thumb holding the thread in place.

And there's your French knot. Sorry for the darkness.
It's good to practice this a few times if you've never done it before, before trying it out on your felt piece.

And again: Wrap the thread around the needle and push the needle through. Tie your thread tails. Or glue them. Whatever you like.


Now the other shirt detail with...the backstitch! I found that I didn't have good turquoise thread, so I ended up using light grey.
Push the needle through the back of the felt a stitch-length away from the edge of the pattern on the detail line.

Then, going "back", bring your needle back down at the edge of the pattern.
(Ignore the two little holes in the pattern on the stitch line...I couldn't decide where to start my stitch at first.)

Bring your needle up a stitch-length from your original hole.

And bring it back down in the SAME hole that started the previous stitch.

You'll continue doing that for the whole of the pattern stitch line. Keep stitches small for easy pattern removal. Tie your thread tails (glue down if you need to keep them out of the way of the pattern edge).


Now cut the piece out--being careful not to snip the stitch closest to the edge.

And carefully remove the paper pattern.

While I'm working on my shirt, I decide to do the little french knot detail on the shoulder piece. (Note how I haven't taped over the stitch mark.)

Now: Onto the face. Since I've already covered the backstitch and such, I'll show pictures, but I won't reiterate the steps. The important details to note are that: 1. All the stitches are really small, 2. I'm using 2 strands of embroidery thread, peeled off of the 6 strand thread.


Once I've done all the stitch detailing (backstitch for all, in noted colors) I carefully cut out the eye holes and cut the piece out.

The back looks like this. Because the threads are so fine and because cream has a tendency to show darker threads, I don't tie them. After I cut the piece out, but before I remove the paper pattern, I crop all the tails really close and glue them down on the back. I follow the lines of the detail when I glue down the threads so they don't show through on other parts of the face.

I do the backstitch on the hair for the detail.

And I cut out all my other pieces. Including the really small ones. As I cut, I lay them on their larger pieces to keep track of them (i.e. the collar lays on the shirt, etc.). I use a tweezers to hold the small pattern pieces in place while cutting.
I also keep the tweezers handy for gluing. Everything. It has saved my fingertips, the curved tweezers has. It's also great for getting precision placement.

All my pieces are stitched and cut out!

So now it's time to glue. Hot glue guns are best for this. I don't recommend any other glue that sets less quickly (or bleeds through the felt more). It takes a bit of practice and (to be honest) a bit of callus to get good with the hot glue gun, but it's the best tool for the job. Don't worry about strings, you can remove or snip them later very easily.
I start with my ribbon hanger. I cut out a piece of ribbon and I spec it out on top of the back layer of the pink circle to make sure it's long enough and placed where I want it to be. Looks about right.

I hot glue the ribbon onto the back, while holding it in place and peeling up the ends from the center.
A WORD TO THE WISE: keep your glue toward the center, not toward the edge of the felt. You do not want to have to stitch through hot glue. Trust me. You don't.

Then comes the second big pink circle piece. I glue it on!
Note how the glue is only in the center?
LEARN FROM ME.


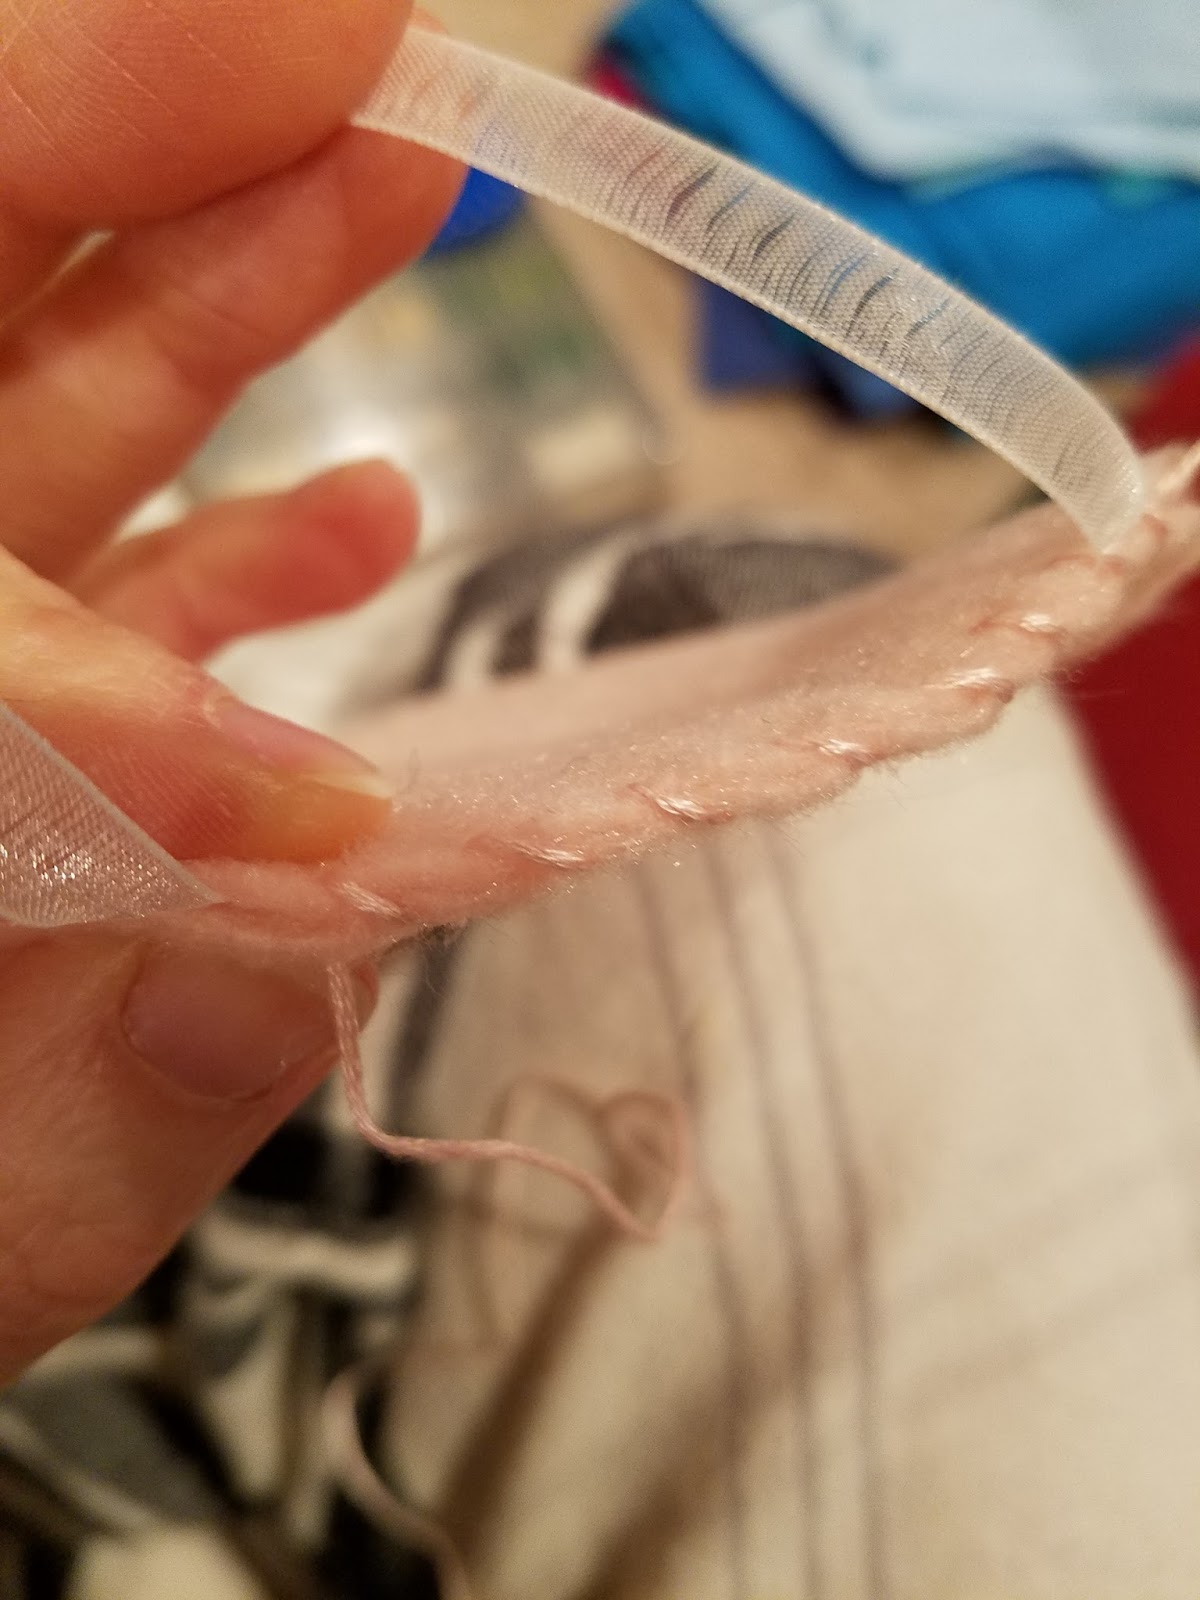
Next I stitch the two pink layers together. For this, I use an overcast stitch. But first a trick I've learned to prevent you from having glued ends visible on the back of your ornament. From the back, skip the back layer on your first stitch and stitch up through the back of the front layer. like so.
This will allow us to tuck the tails in later. If it seems too complex and you don't mind seeing the knot/tails on the back, then just stitch from the back layer to the front.

Now the overcast stitch. It's basic up and down around the edges. Bring your stitch up through the front and then back around (through ALL layers now) through the back and up to the front again.


For the last stitch, make a tiny stitch through the top layer just to the middle. When you are finished with this you'll have two little tails in between the two layers. We're going to glue them in!

Tuck in your tails using a tweezers.

In that little pocket/gap, put the tip of your glue gun and give it a little squirt. Then press the layers (gently) together. Boom. No tails.

Now more gluing! Glue the small circle on.

Glue ALL the pieces onto the shirt before gluing the shirt onto the main body piece. This will give you extra layers to hold onto while you're applying glue. Also, it's neater and you're less prone to losing small pieces.


Next, glue all the pieces onto the head--hair and earrings. Glue the completed head onto the main body (I forgot to take a picture of this step.)

Now the eyes. Tricksy eyes. Take the eye pieces in your tweezers, put a tiny dab of glue on them, and place them in the eye sockets.


Next we're going to fill the whites of the eyes with a little bit of white fluff (this is white felt, but when you cut a really small piece it loses its integrity and will to be a distinct shape). This is too small to glue, it will just fall apart--so you'll take it in your tweezers and gently stuff it around the pupil.


Now your Betty body is done. And it's time to glue her onto the circle background. Place her without gluing first to make sure she's hanging right (that she's centered, the hanger is in the right spot, etc.) Then glue her on. I did the bottom half first, then lifted up her head and glued the head on second.

And there's Betty. Her pattern will be available with the rest of the Golden Girls in my Etsy Shop. It's just not there yet because I have to finish the other gals. :)
No comments:
Post a Comment