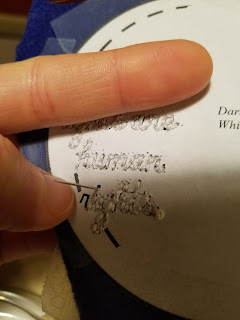
One thing that might be particularly tricky if you don't have instructions: Stitched lettering. I have an order of operations that makes it go much more smoothly than it can otherwise go.
First:
I didn't take pictures of the very start of the process. I cut out the paper pattern and tape it to an approximate-sized piece of felt around the edges.
Note: I do not cover any stitch areas with tape. It makes it hard to tear later.
Note 2: I do not cut out the felt ornament at this time.
 |
| Tape down! Don't cut! |
And here's a cut because more pics....
I'm using 3 strands of thread. For this kind of lettering, I like to use 2-3 strands. I'm experimenting with 3 because 2 sometimes doesn't show up as well as I'd like.
 |
| 3 Strands! |
 |
| On stitch forward, one stitch back. . . |
I also used french knots for the punctuation. There are better videos online than I could ever show you in pictures, but here is me making a French Knot.
 |
| Put needle through the back right below where you want the knot to be. |
 |
| Loop thread around the needle twice. |
 |
| Keep thread tight as you push your needle through where you want your knot. |
 | ||
| Push the needle through and voila. |
THEN cut your circle out.
 |
| So circle-y! |
Now, removing the paper pattern. I like to use a tweezers for the finer pieces in between the letters. It works great. This is a very tedious part of the process for me.
After you have tiny bits of paper everywhere, you know you're done.
Voila!
Letter stitching isn't difficult, but it can be tedious--especially focusing on being very precise on your stitches. However, it looks very cool.
Font: The font I use for this is called "That's Font Folks!", and is inspired by the Loony Tunes title card font.


No comments:
Post a Comment